Shields for the Front Lines of COVID-19
Donation protected
Hello! My name is Evan Digby. I'm a 3D printing hobbyist and my goal is to produce at least 300 face shields to donate to the heroes on the front-lines of the fight against COVID-19. I've already produced 40 to prove I can (thank you to those who donated offline!), and now it's time to ramp up production.
Why 300? In order to produce more than 300 in a reasonable timeframe I would need an additional 3D printer ($300-$500) and a solution for more quickly cutting the face shields ($500-$3000). I am not asking for either of those things so 300 is a solid goal for now for what I can produce with my current facilities.
I'm currently donating to local health professionals through SafeCare BC Operation Protect
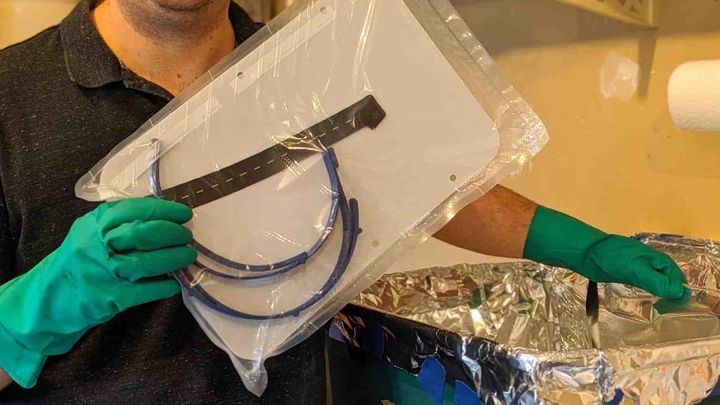
Here's what my shields look like:

The costs for each shield:
1. ~$2.00 for PETG filament
2. ~$2.50 for .030" PETG shield (transparent)
3. ~$0.50 for Elastic band
The process:
1. 3D print shield headband and chin from the models found at: Prusa Research 3D PRINTED FACE SHIELDS FOR MEDICS AND PROFESSIONALS
2. Cut shield to size and punch holes in top and bottom (3-hole punch).
3. Sterilize components using 254nm UV-C (per instructions found at Prusa Research ).
4. Vacuum seal components for sterile transportation.
Here's me printing the first ~40:
COMING SOON: Entire end-to-end process video.
Why 300? In order to produce more than 300 in a reasonable timeframe I would need an additional 3D printer ($300-$500) and a solution for more quickly cutting the face shields ($500-$3000). I am not asking for either of those things so 300 is a solid goal for now for what I can produce with my current facilities.
I'm currently donating to local health professionals through SafeCare BC Operation Protect
Here's what my shields look like:
The costs for each shield:
1. ~$2.00 for PETG filament
2. ~$2.50 for .030" PETG shield (transparent)
3. ~$0.50 for Elastic band
The process:
1. 3D print shield headband and chin from the models found at: Prusa Research 3D PRINTED FACE SHIELDS FOR MEDICS AND PROFESSIONALS
2. Cut shield to size and punch holes in top and bottom (3-hole punch).
3. Sterilize components using 254nm UV-C (per instructions found at Prusa Research ).
4. Vacuum seal components for sterile transportation.
Here's me printing the first ~40:
COMING SOON: Entire end-to-end process video.
Organizer
Evan Digby
Organizer
Maple Ridge, BC


